springboot+easyExcel快速上手指南
Contents
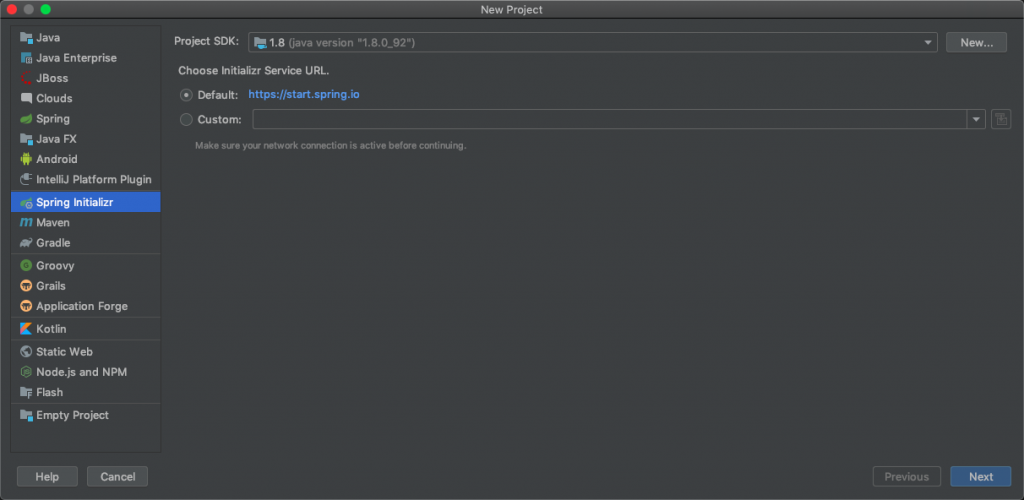
1 新建springboot工程
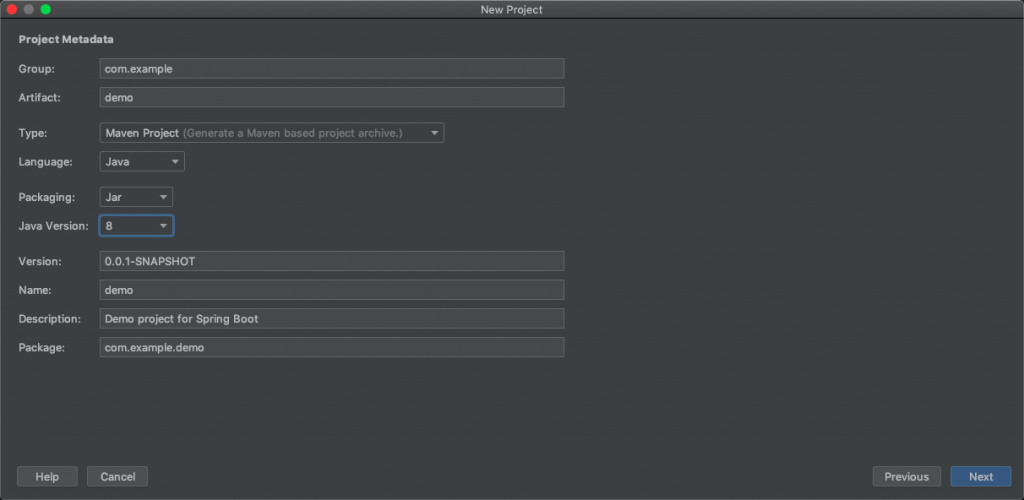
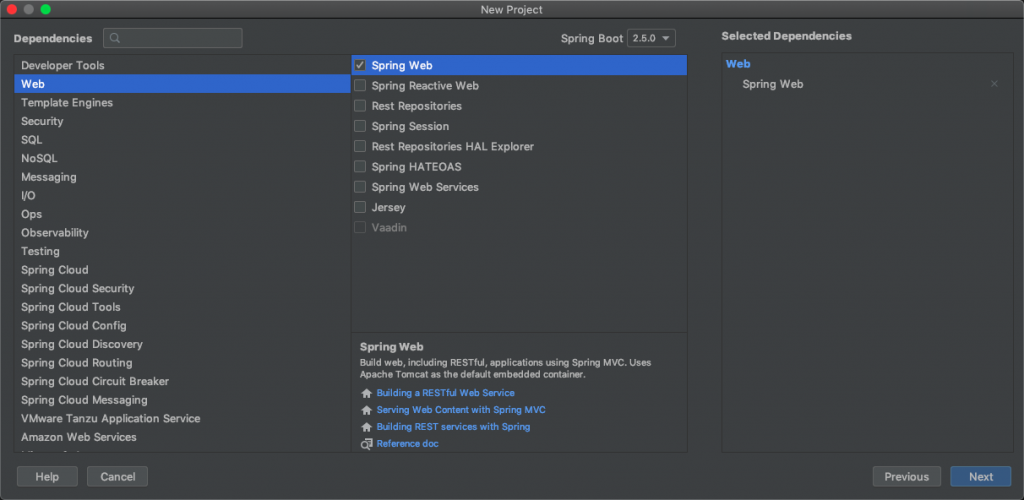
依赖里选择Web下的Spring Web,其它均保持默认即可。

2 引入easyExcel依赖
<?xml version="1.0" encoding="UTF-8"?>
<project xmlns="http://maven.apache.org/POM/4.0.0" xmlns:xsi="http://www.w3.org/2001/XMLSchema-instance"
xsi:schemaLocation="http://maven.apache.org/POM/4.0.0 https://maven.apache.org/xsd/maven-4.0.0.xsd">
<modelVersion>4.0.0</modelVersion>
<parent>
<groupId>org.springframework.boot</groupId>
<artifactId>spring-boot-starter-parent</artifactId>
<version>2.5.0</version>
<relativePath/> <!-- lookup parent from repository -->
</parent>
<groupId>com.example</groupId>
<artifactId>demo1</artifactId>
<version>0.0.1-SNAPSHOT</version>
<name>demo1</name>
<description>Demo project for Spring Boot</description>
<properties>
<java.version>1.8</java.version>
</properties>
<dependencies>
<!--引入easyExcel的依赖-->
<dependency>
<groupId>com.alibaba</groupId>
<artifactId>easyexcel</artifactId>
<version>2.2.10</version>
</dependency>
<dependency>
<groupId>org.springframework.boot</groupId>
<artifactId>spring-boot-starter-web</artifactId>
</dependency>
<dependency>
<groupId>org.springframework.boot</groupId>
<artifactId>spring-boot-starter-test</artifactId>
<scope>test</scope>
</dependency>
</dependencies>
<build>
<plugins>
<plugin>
<groupId>org.springframework.boot</groupId>
<artifactId>spring-boot-maven-plugin</artifactId>
</plugin>
</plugins>
</build>
</project>
3 创建实体类
实体类对象的数据,用于导出到Excel中去。
放在com.example.demo路径下,新建的dao包下。
package com.example.demo.dao;
/**
* @Author:asher
* @Date:2021/5/22 06:44
* @Description:com.example.demo.dao
* @Version:1.0
*/
public class User {
private int id;
private String name;
public User(int id, String name) {
this.id = id;
this.name = name;
}
@Override
public String toString() {
return "User{" +
"id=" + id +
", name='" + name + '\'' +
'}';
}
public int getId() {
return id;
}
public void setId(int id) {
this.id = id;
}
public String getName() {
return name;
}
public void setName(String name) {
this.name = name;
}
}
4 创建工具类
放在com.example.demo路径下,新建的util包下。
package com.example.demo.util;
import com.alibaba.excel.EasyExcel;
import com.alibaba.excel.ExcelWriter;
import com.alibaba.excel.write.metadata.WriteSheet;
import com.example.demo.dao.User;
import javax.servlet.http.HttpServletResponse;
import java.io.IOException;
import java.util.List;
/**
* @Author:asher
* @Date:2021/5/22 06:53
* @Description:com.example.demo.util
* @Version:1.0
*/
public class ExcelUtil {
public static void generateExcel(HttpServletResponse response, List<User> list) throws IOException {
// 创建ExcelWriter对象
ExcelWriter excelWriter = EasyExcel.write(response.getOutputStream()).build();
// 创建工作簿
WriteSheet writeSheet = EasyExcel.writerSheet(0, "sheet1").head(User.class).build();
// 向Excel中写入数据
excelWriter.write(list, writeSheet);
// 关闭输出流
excelWriter.finish();
}
}5 创建控制器
放在com.example.demo路径下,新建的controller包下。
package com.example.demo.controller;
import com.example.demo.dao.User;
import com.example.demo.util.ExcelUtil;
import org.springframework.stereotype.Controller;
import org.springframework.web.bind.annotation.RequestMapping;
import org.springframework.web.bind.annotation.ResponseBody;
import javax.servlet.http.HttpServletResponse;
import java.io.IOException;
import java.util.ArrayList;
import java.util.List;
/**
* @Author:asher
* @Date:2021/5/22 06:46
* @Description:com.example.demo.controller
* @Version:1.0
*/
@Controller
public class UserController {
@RequestMapping("/test")
@ResponseBody
public void test(HttpServletResponse response) throws IOException {
List<User> userList = new ArrayList<>();
userList.add(new User(1, "小红"));
userList.add(new User(2, "花花"));
response.setContentType("application/vnd.ms-excel");
response.setHeader("Content-Disposition", "attachment; filename=" + "test.xlsx");
ExcelUtil.generateExcel(response, userList);
}
}6 启动工程
启动DemoApplication:
package com.example.demo;
import org.springframework.boot.SpringApplication;
import org.springframework.boot.autoconfigure.SpringBootApplication;
@SpringBootApplication
public class Demo1Application {
public static void main(String[] args) {
SpringApplication.run(Demo1Application.class, args);
}
}7 在浏览器中访问,自动下载Excel文件
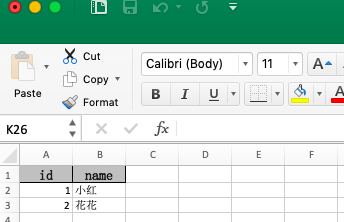
8 查看Excel文件内容
id  name
1 小红
2 花花
9 小结
通过easyExcel,快速的上手,实现了一个Java生产Excel文件的样例项目。其中,关于easyExcel的核心类使用,需要再深入学习一下。以及,工具类中的关于泛型参数需要再改进,而不应该是将泛型参数直接写死到方法签名中。